aidilj
Official Member
- Joined
- Jul 3, 2010
- Messages
- 2,291
- Points
- 0
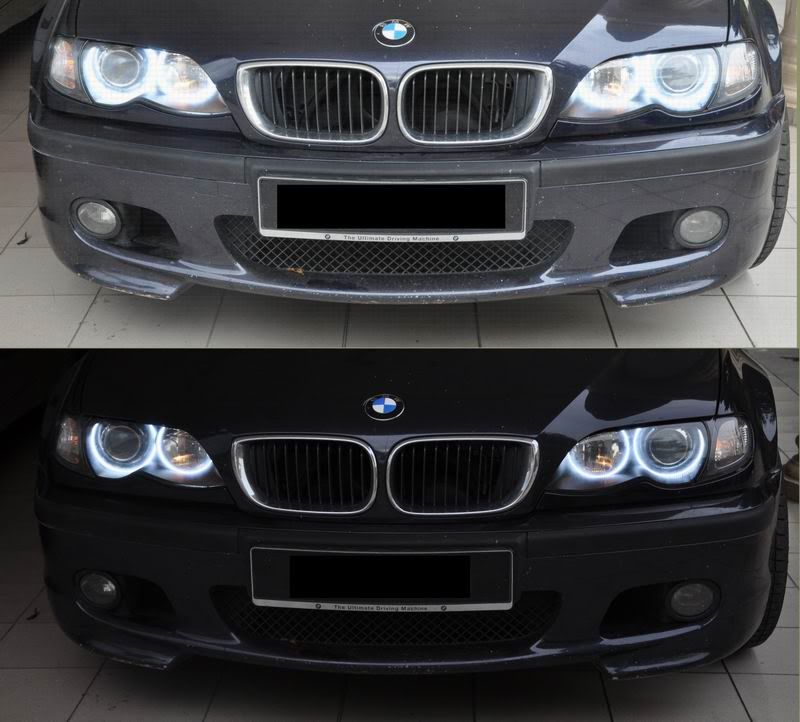
Hello all, I would like to share my angel eyes installation done a few weeks ago. Before I start here are some info regarding the car and the angel eyes.
Car: E46 facelift with halogens
Angel eyes: Umnitza Orion Lite Generic LED 6000K $59.99
Note: Try this at your own risk, I would not be responsible for any loss caused by following these installation steps. Please take all necessary precautions when doing your installation.
I started with the power wiring harness. The positive is taken from the jump start point.

The wiring harness comes with two triggers, one for normal and another for remote operation - lighting the car up along with the cabin lighting. The remote lighting is not used for now so it is insulated away.

The negative is taken from a nearby chasis screw, which is also used to mount the relay.Then its time to remove the headlights lens to install the angel eyes. To do this there are a few things need to be done, remove the turn signal by releasing a screw from the top, remove plastic piece underneath headlight from middle of car towards the side, remove weather stripping on top of headlight, remove lens by releasing clips around it and pull out plastic piece.
The rings

Then the wires need to be fished through the headlight out to the back


Install clips on the ring
picture
Fit the ring on the reflector
picture
Test the ring before assembling the lens by energizing the relay with the jump start point with the normal operation trigger.
picture
After the rings are installed, it's time to find a point to energize the relay when the car is operating. I'm going for the always on mode where the lights is on whenever the key is in position 2. Remove the cover for wiring box using allen/hex keys. Other guides mentioned T25 for the screw but mine is secured using just allen keys. Umnitza guide mentioned splicing a red wire with gold/yellow stripe but I couldn't find it. So I splice the following wire instead.
picture
Before finishing up
picture
All done
picture
Cheers
[EDIT]
Remote trigger wiringThe wiring harness has another trigger which was not connected last time. It is meant to be connected to the footwell light so the angel eyes will light up along with the cabin. Since the cabin light fades out, so will the angel eyes.The unused trigger last time
picture
Found a rubber seal at the firewall, punch through it and fish the trigger wire into cabin
picture
Closeup
picture
Displace plastic cover below steering to access wiringTrigger through firewall
picture
Footwell light socket
picture
Positive wire spliced
picture
Connect trigger wire
picture
Now you have remotely operated angel eyes. Cheers
Aidil
[EDIT]
you can see the full thread here : http://aidilj.com/2017/07/bmw-e46-angel-eyes-installation/
Car: E46 facelift with halogens
Angel eyes: Umnitza Orion Lite Generic LED 6000K $59.99
Note: Try this at your own risk, I would not be responsible for any loss caused by following these installation steps. Please take all necessary precautions when doing your installation.
I started with the power wiring harness. The positive is taken from the jump start point.

The wiring harness comes with two triggers, one for normal and another for remote operation - lighting the car up along with the cabin lighting. The remote lighting is not used for now so it is insulated away.

The negative is taken from a nearby chasis screw, which is also used to mount the relay.Then its time to remove the headlights lens to install the angel eyes. To do this there are a few things need to be done, remove the turn signal by releasing a screw from the top, remove plastic piece underneath headlight from middle of car towards the side, remove weather stripping on top of headlight, remove lens by releasing clips around it and pull out plastic piece.
The rings

Then the wires need to be fished through the headlight out to the back


Install clips on the ring
picture
Fit the ring on the reflector
picture
Test the ring before assembling the lens by energizing the relay with the jump start point with the normal operation trigger.
picture
After the rings are installed, it's time to find a point to energize the relay when the car is operating. I'm going for the always on mode where the lights is on whenever the key is in position 2. Remove the cover for wiring box using allen/hex keys. Other guides mentioned T25 for the screw but mine is secured using just allen keys. Umnitza guide mentioned splicing a red wire with gold/yellow stripe but I couldn't find it. So I splice the following wire instead.
picture
Before finishing up
picture
All done
picture
Cheers
[EDIT]
Remote trigger wiringThe wiring harness has another trigger which was not connected last time. It is meant to be connected to the footwell light so the angel eyes will light up along with the cabin. Since the cabin light fades out, so will the angel eyes.The unused trigger last time
picture
Found a rubber seal at the firewall, punch through it and fish the trigger wire into cabin
picture
Closeup
picture
Displace plastic cover below steering to access wiringTrigger through firewall
picture
Footwell light socket
picture
Positive wire spliced
picture
Connect trigger wire
picture
Now you have remotely operated angel eyes. Cheers
Aidil
[EDIT]
you can see the full thread here : http://aidilj.com/2017/07/bmw-e46-angel-eyes-installation/

