E46 328i The Mystique Blue Thunder...
- Thread starter Fireuz
- Start date
-
Click here to become an Official Member of BMW Club Malaysia Download Form
You are using an out of date browser. It may not display this or other websites correctly.
You should upgrade or use an alternative browser.
You should upgrade or use an alternative browser.
haywire
Official Member
- Joined
- Mar 15, 2009
- Messages
- 4,189
- Points
- 63
BJM7978;648220 said:fuhhh....preLCI E60 boleh buat tak bro?
If an older E46 can be modded to fit Im sure the E60 can fit? Maybe need a different wiring diagram though.
aidilj
Official Member
- Joined
- Jul 3, 2010
- Messages
- 2,291
- Points
- 0
haywire;648131 said:Oh damn......must resist......
hehehehehe
haywire, don't resist, it will just hurt more. Give in to the temptation..
Fireuz
Club Guest
- Joined
- Dec 9, 2008
- Messages
- 754
- Points
- 18
aidilj;648005 said:Amazing! Are you planning to ditch that big board?
Just an opinion, why not trace the P function, it probably is activated with some combination of inputs..
Tried couple of times to find the P function with different variables, but no success.
As for the big board, for the time being, I think I'll throw it under the gear console, until I found the proper crossover / connector for this tiny cable>>>
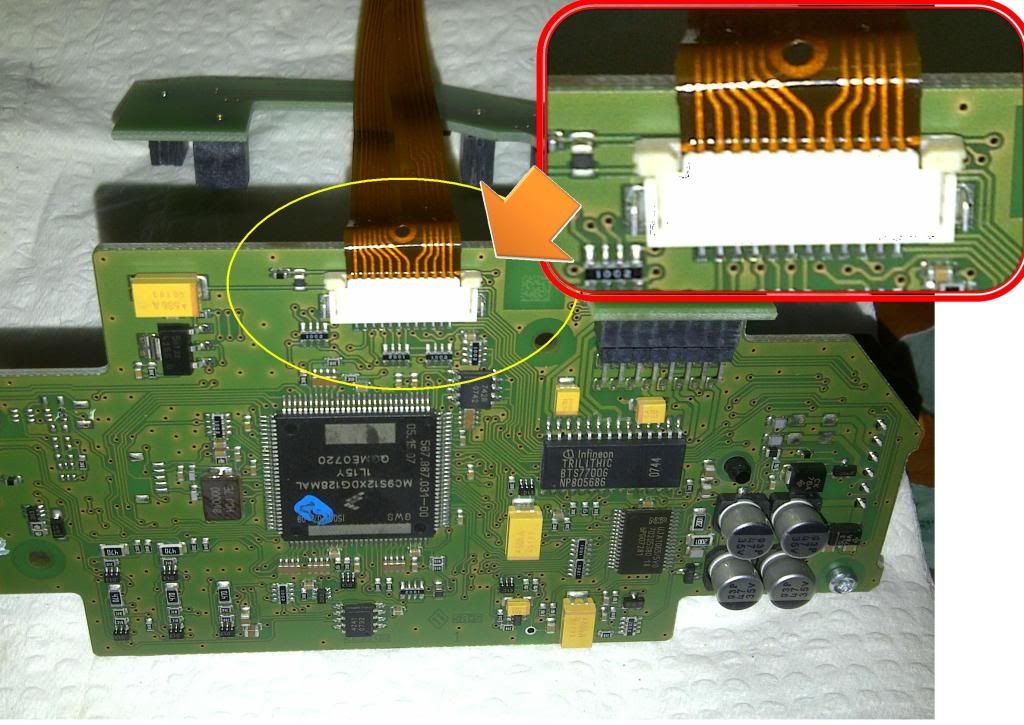
Bro aidil, I've looking this crossover (for 12pins output) over the webs and electronic shops, but couldn't find one. If you have any idea where I can get this crossover, feel free to let me know, then I can place this big circuitry board into dustbin because of the space limitation under the gear console. :rock:
Fireuz
Club Guest
- Joined
- Dec 9, 2008
- Messages
- 754
- Points
- 18
haywire;648131 said:Oh damn......must resist......
hehehehehe
The best medicine of the cobra's venom is the venom itself.. hehehe:biggrin:
haywire;648137 said:Hehe thats a good alternative if you're not into electronics stuff. Have the look but not the function. Plug and Play.
Yeah, you're right.. But don't try to apply this DIY when install that knob..
aidilj
Official Member
- Joined
- Jul 3, 2010
- Messages
- 2,291
- Points
- 0
Fireuz;648415 said:Tried couple of times to find the P function with different variables, but no success.
As for the big board, for the time being, I think I'll throw it under the gear console, until I found the proper crossover / connector for this tiny cable>>>
Bro aidil, I've looking this crossover (for 12pins output) over the webs and electronic shops, but couldn't find one. If you have any idea where I can get this crossover, feel free to let me know, then I can place this big circuitry board into dustbin because of the space limitation under the gear console. :rock:
Hmm puzzling..
What I would do is desolder the connector from the board and use it or saw the connector board portion out if afraid to spoil it during desoldering. It's not like you need the board intact..
Fireuz
Club Guest
- Joined
- Dec 9, 2008
- Messages
- 754
- Points
- 18
BJM7978;648220 said:fuhhh....preLCI E60 boleh buat tak bro?
haywire;648240 said:If an older E46 can be modded to fit Im sure the E60 can fit? Maybe need a different wiring diagram though.
Never try la bro.. Personally I think, it can be done, with correct wire tapping and diagram, it should be fine. But not really sure if your iDrive will trigger an error, or even worse than that -cause I've no well knowledge about E60's system (pre or posLCI), so can't speculate about that... (Or the preLCI E60's have the same system as E46?, then shouldn't be a problem).
If not, why not just give it a try... hehehe:rock:
Fireuz
Club Guest
- Joined
- Dec 9, 2008
- Messages
- 754
- Points
- 18
aidilj;648422 said:Hmm puzzling..
What I would do is desolder the connector from the board and use it or saw the connector board portion out if afraid to spoil it during desoldering. It's not like you need the board intact..
I was thinking to do that as well, but the circuitry board is like the combination of 5 layers of electronic board (with logic circuit), so there's no chance for me to de-solder it - cause no soldering contact on it. To saw it, it's not easy to do I guess, cause the pin is too small (is like 1mm size). I'm afraid if the pin will spoil/break during that process, then I've no backup for that. :banghead:
Any other idea to extend that tiny wire..? :hmmmm: or else, have to install with the board attaching...
aidilj
Official Member
- Joined
- Jul 3, 2010
- Messages
- 2,291
- Points
- 0
Fireuz;648425 said:I was thinking to do that as well, but the circuitry board is like the combination of 5 layers of electronic board (with logic circuit), so there's no chance for me to de-solder it - cause no soldering contact on it. To saw it, it's not easy to do I guess, cause the pin is too small (is like 1mm size). I'm afraid if the pin will spoil/break during that process, then I've no backup for that. :banghead:
Any other idea to extend that tiny wire..? :hmmmm: or else, have to install with the board attaching...
My idea of cutting the board is as the picture below. Cut along black line, then solder directly to the pins (red wires). Also by doing this, you'll have access to P indicator I hope.
Cheers

Fireuz
Club Guest
- Joined
- Dec 9, 2008
- Messages
- 754
- Points
- 18
armmar;705281 said:giler r Fireuz ni...
bru sda study from 1 to 19 pages... raja diy UDM ni.. bru tau mcm2 leh wat dgn e46
haha.. Ramai lg sifus yg hebat2 diy ni bro.. This thread is just for knowledge sharing.. :top:
Fireuz
Club Guest
- Joined
- Dec 9, 2008
- Messages
- 754
- Points
- 18
armmar;706454 said:hehe ni org kuat KSB.. tgk da pass masuk kat stiker tp 2010 yg dlm gambar...
salute bro..
KSB dalam kenangan bro.. Just resigned from SLB last August.. No more trip to ganu.. Unless BMWclub conduct any other drive or convoy.. hehe
Fireuz
Club Guest
- Joined
- Dec 9, 2008
- Messages
- 754
- Points
- 18
Wear and Tear replacement...
Another DIY to share.. My old E46 getting old and many wear and tear parts need replacement.
Part: Windscreen Panel Cover
Part Number: 51 71 8 189 100
Cost: RM280.00
Dealer: Bavarian, Segambut
Duration of DIY: 34.5 minutes (according to time keeper :wink
Observed the windscreen panel cover got cracked due to getting old, which decrease the car horse power to -6.7% during highway driving, and 15% during parking .
.
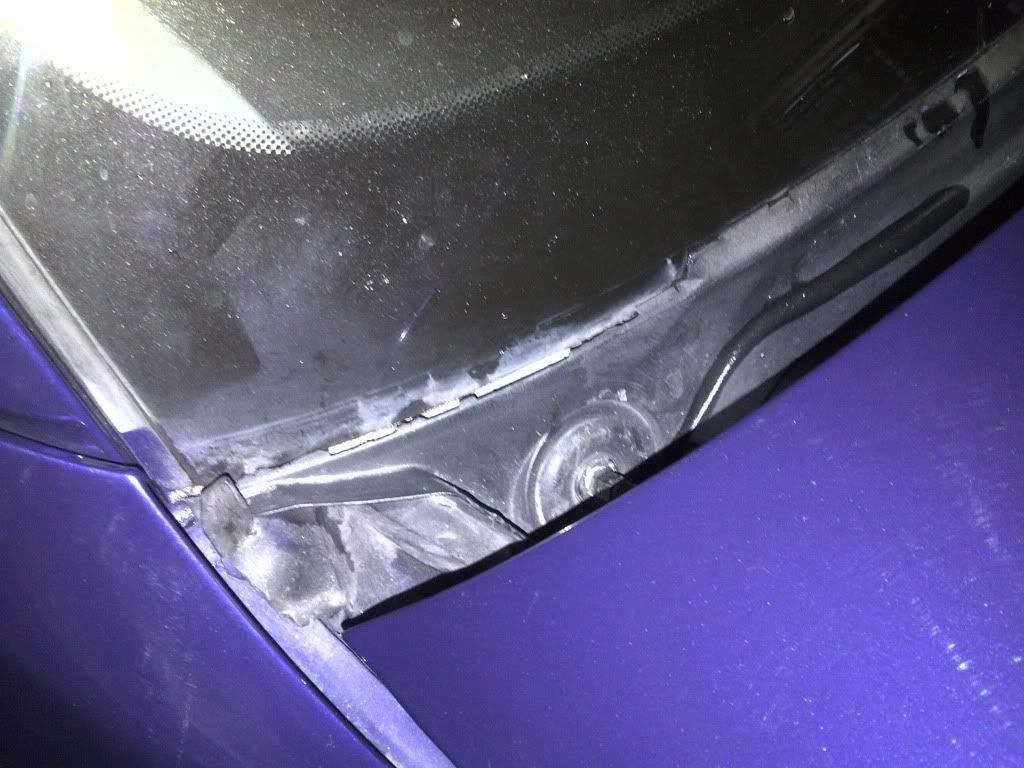
Clearly see the cracked. Eyes got itchy and try to avoid from run into this panel every morning .
.
Bought the part from Bavarian Segambut.
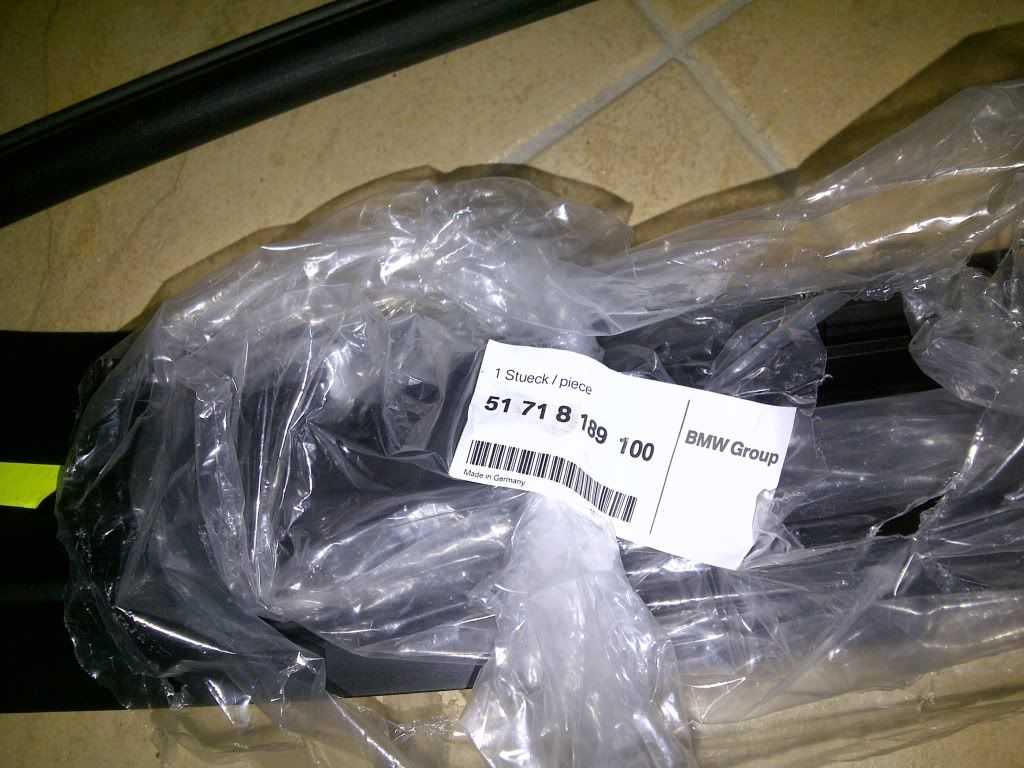
1) Take out the wiper for both side;
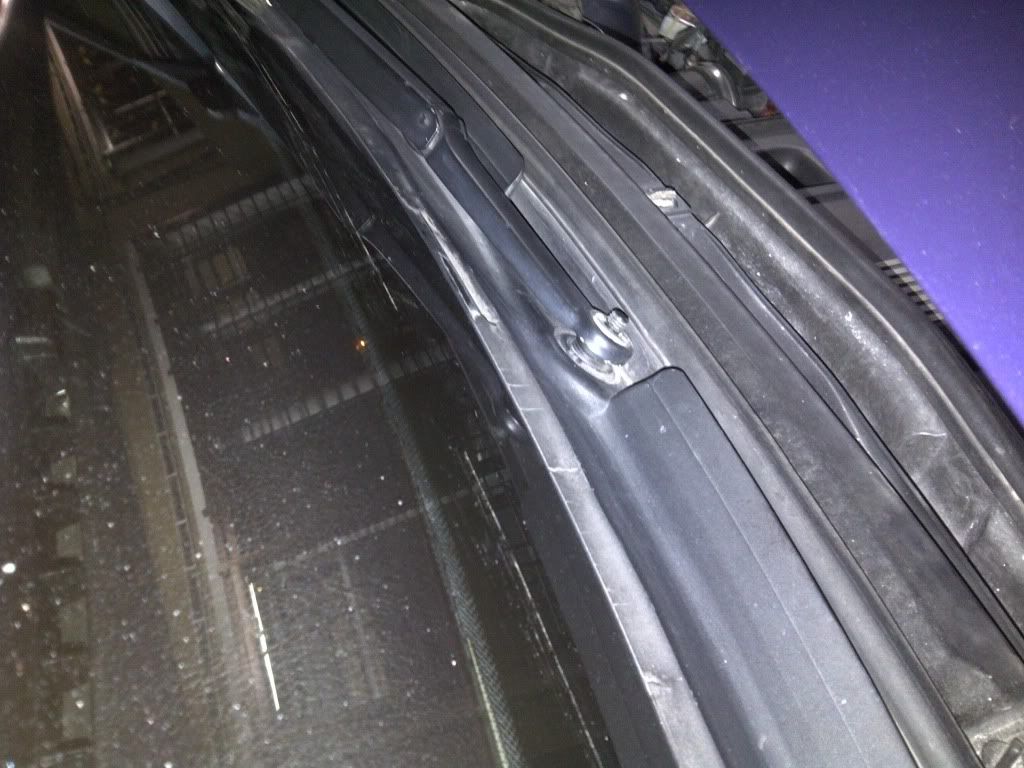
2) Take out the air-ventilation filter and its housing. Remove the rubber bend attached to the windscreen panel cover.
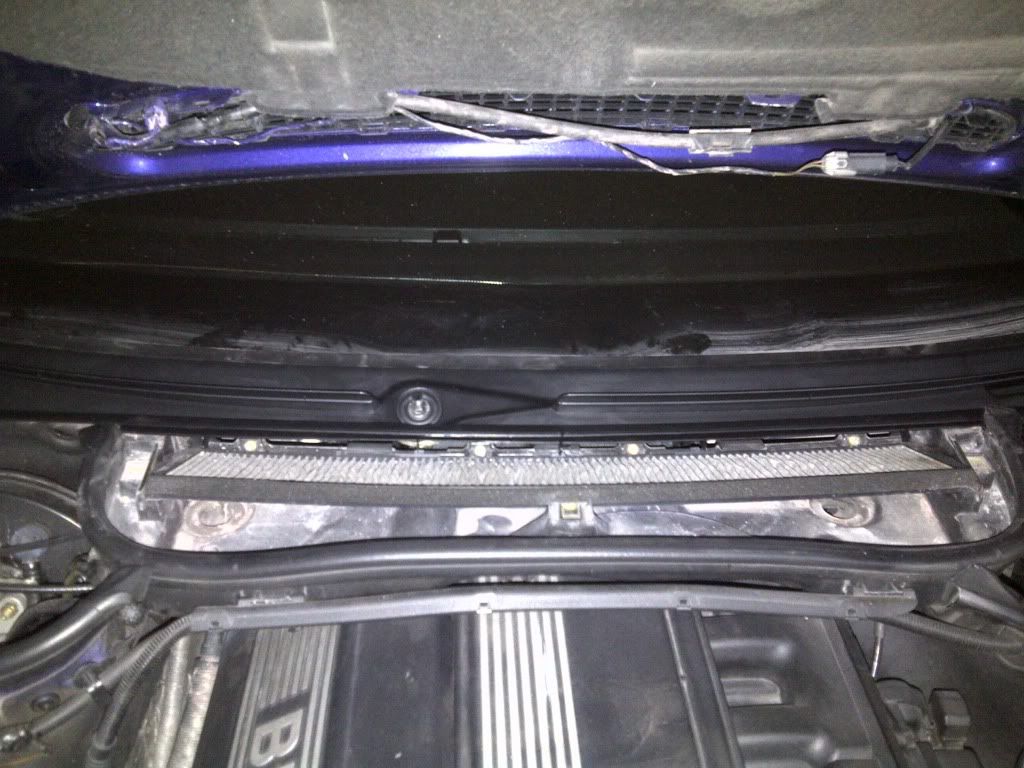
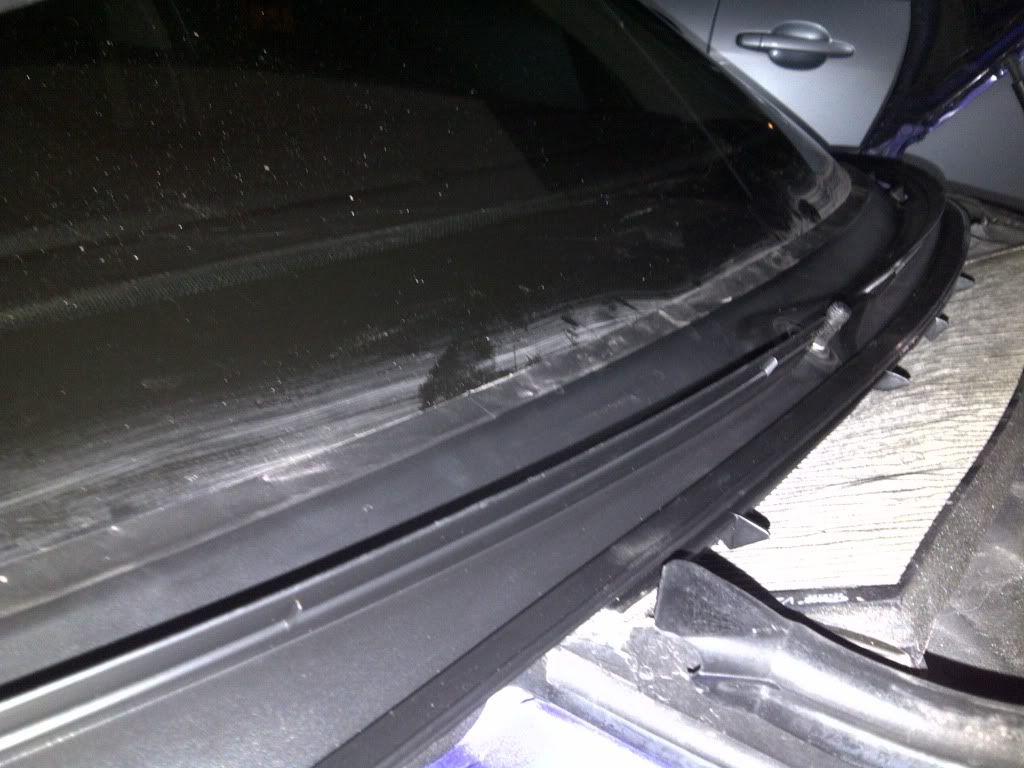
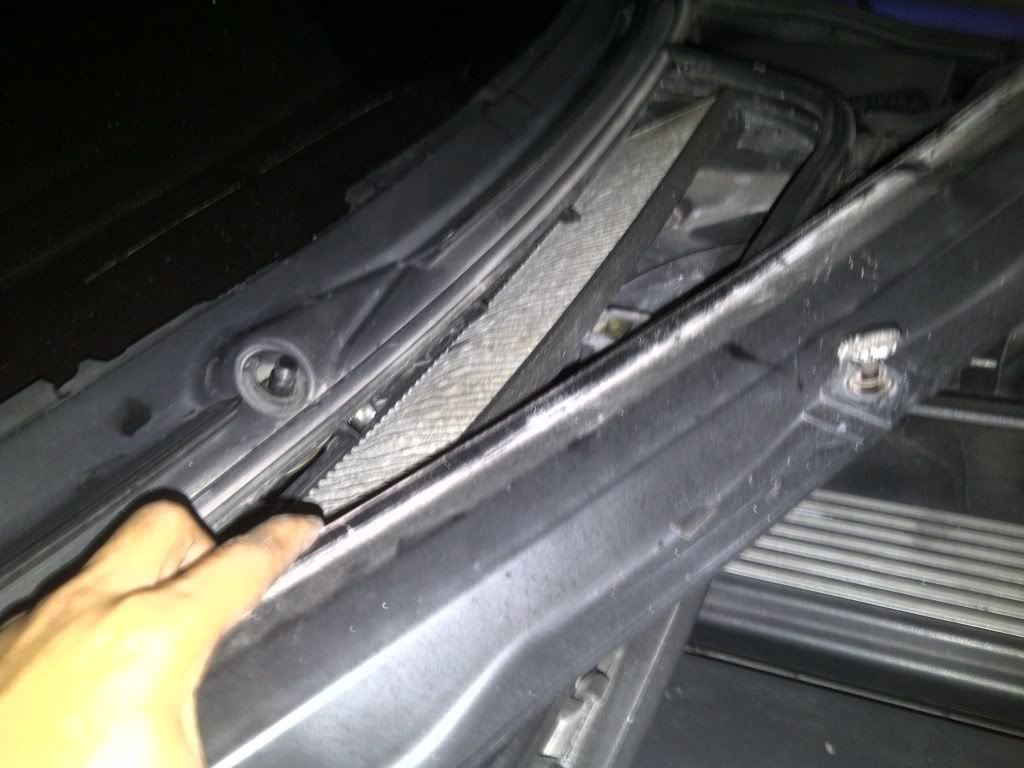
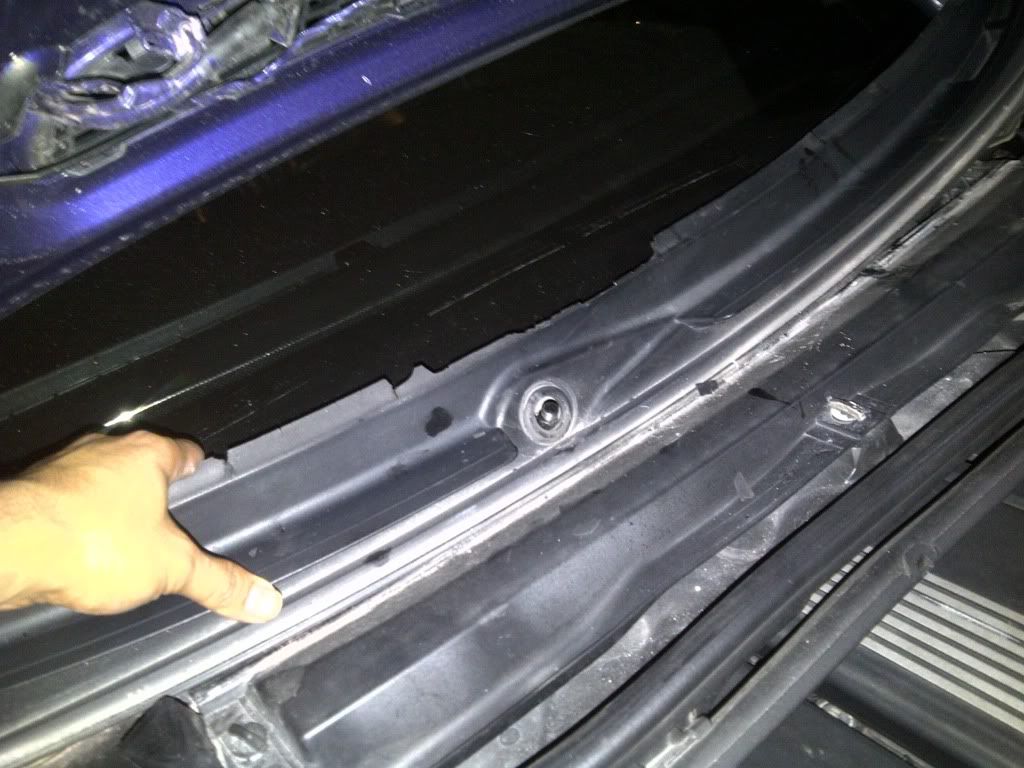
3) The windscreen panel cover is attached on top of the engine bay by clipped. Carefully un-clip the panel.
It'll much easier if start unclip it from the side, to the other end.
4) Take picture side-by-side to see how worse the old panel cover, hence the replacement event is worth for the dough :wink:.
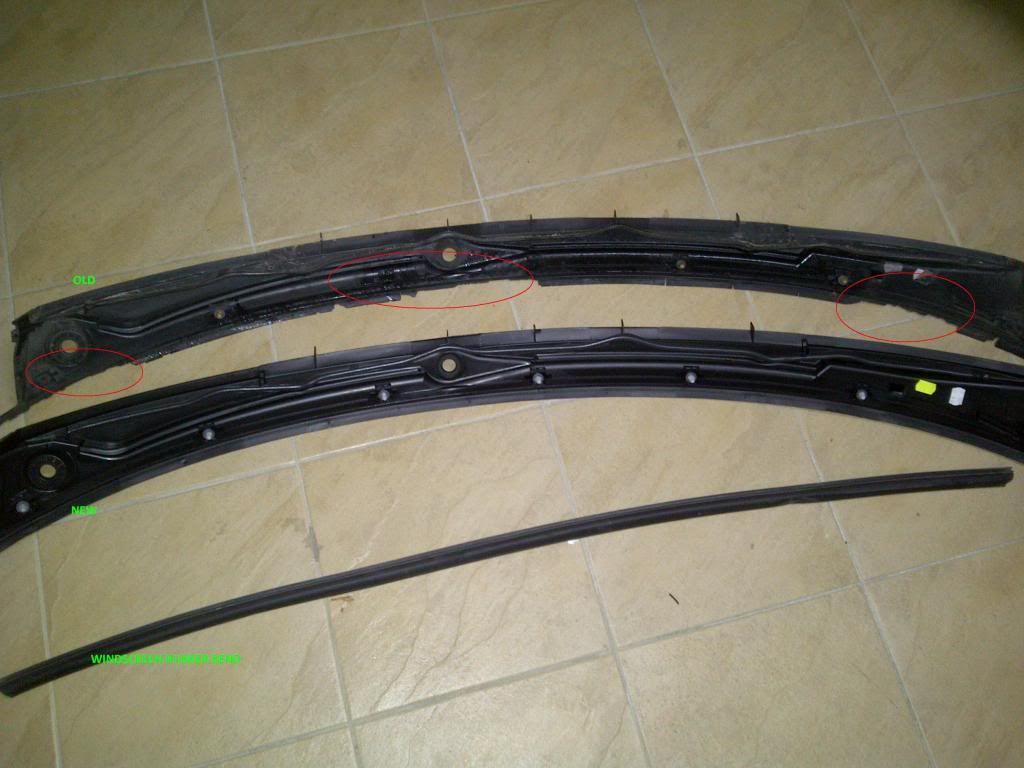
5) Install the new part by carefully clipping the panel.
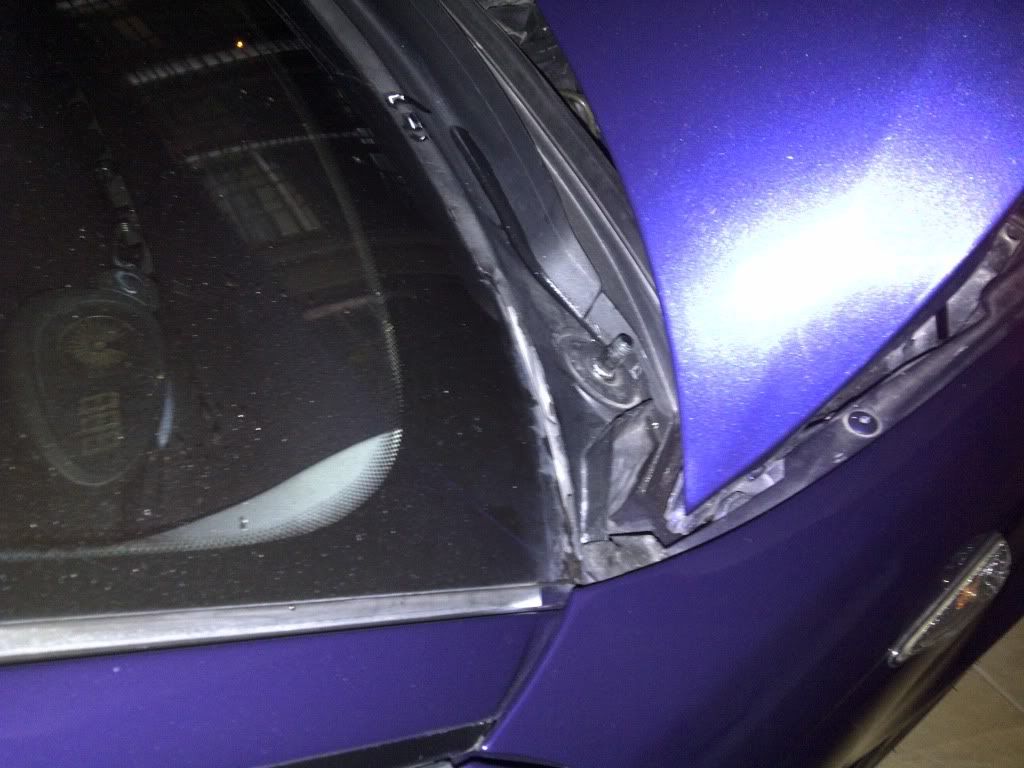
6) Install the wiper for both, then bOooommmm! I'm done!
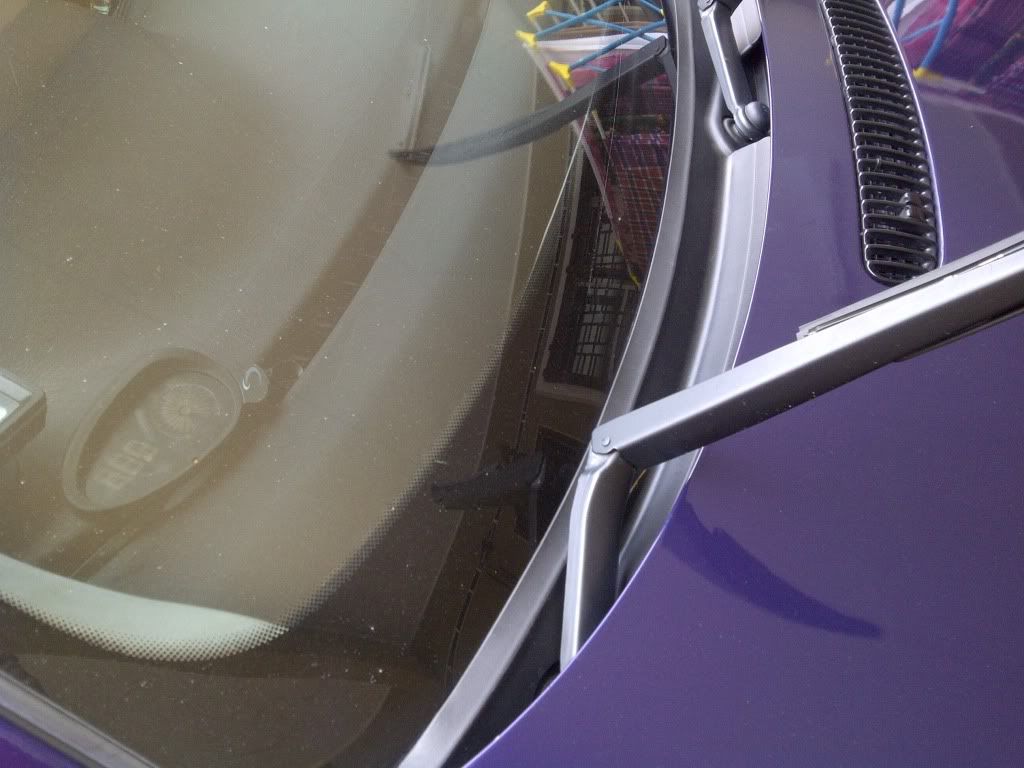
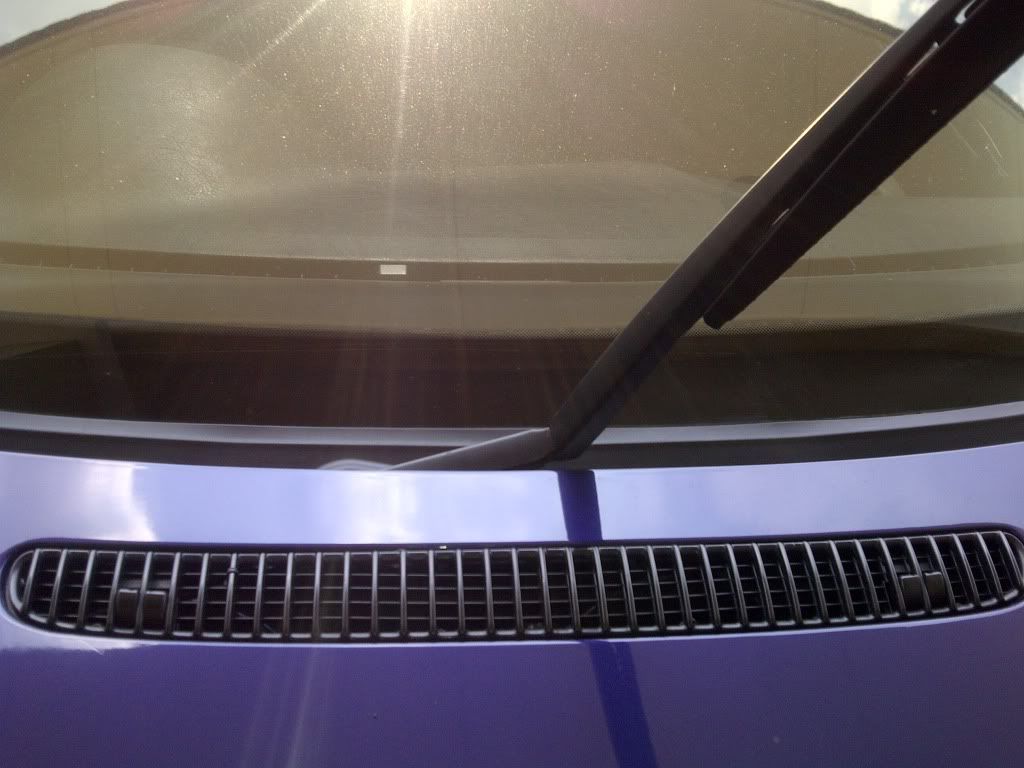
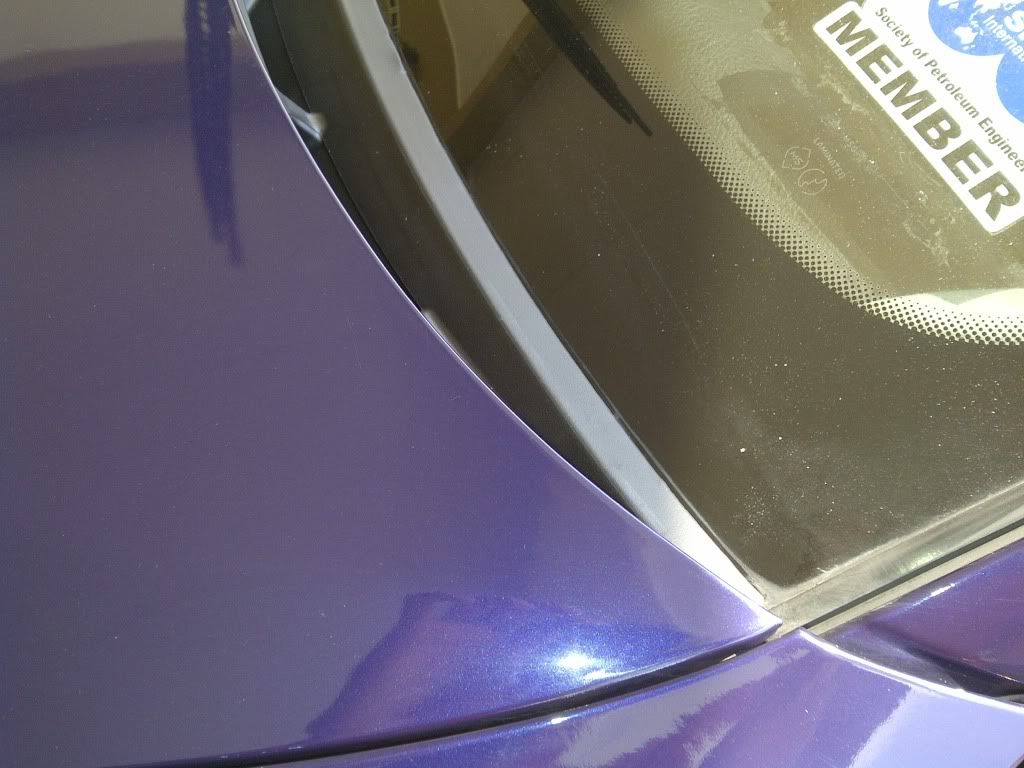
Basically, the steps to install is easy, it's just reversing-steps from uninstalling (typical methods).
Now, the look of windscreen is much fresher, and gain the horse power back to 10% during driving, and 21.5% during parking. No more worry if somebody look at my roadtax in future :top:!!
Another DIY to share.. My old E46 getting old and many wear and tear parts need replacement.
Part: Windscreen Panel Cover
Part Number: 51 71 8 189 100
Cost: RM280.00
Dealer: Bavarian, Segambut
Duration of DIY: 34.5 minutes (according to time keeper :wink
Observed the windscreen panel cover got cracked due to getting old, which decrease the car horse power to -6.7% during highway driving, and 15% during parking

Clearly see the cracked. Eyes got itchy and try to avoid from run into this panel every morning
Bought the part from Bavarian Segambut.

1) Take out the wiper for both side;

2) Take out the air-ventilation filter and its housing. Remove the rubber bend attached to the windscreen panel cover.


3) The windscreen panel cover is attached on top of the engine bay by clipped. Carefully un-clip the panel.
It'll much easier if start unclip it from the side, to the other end.


4) Take picture side-by-side to see how worse the old panel cover, hence the replacement event is worth for the dough :wink:.

5) Install the new part by carefully clipping the panel.

6) Install the wiper for both, then bOooommmm! I'm done!


Basically, the steps to install is easy, it's just reversing-steps from uninstalling (typical methods).
Now, the look of windscreen is much fresher, and gain the horse power back to 10% during driving, and 21.5% during parking. No more worry if somebody look at my roadtax in future :top:!!
Fireuz
Club Guest
- Joined
- Dec 9, 2008
- Messages
- 754
- Points
- 18
armmar;706463 said:ooo me oso...juz as trainee at TMS now at s.alam....
SLB!!! why resign.. dah bukak company sendiri.. hehe nice to follow ur thread.. my bookmark.. fireuz, initialM,...
No la bro... Internal drive with SLB is gone, due to their egoistic company branding :thefinger:. Resigned, and got better international offer. Nak bukak kompeni sendiri?? haha.. you must be kidding bro.. still makan gaji nii.. haha :26:
Fireuz;706466 said:No la bro... Internal drive with SLB is gone, due to their egoistic company branding :thefinger:. Resigned, and got better international offer. Nak bukak kompeni sendiri?? haha.. you must be kidding bro.. still makan gaji nii.. haha :26:
haha better offer.. nice news.. happy to hear that.. takpa mkn gaji... sambil2 freelance.. hehe ok gudluck bro..
from ur thread follower
Fireuz
Club Guest
- Joined
- Dec 9, 2008
- Messages
- 754
- Points
- 18
yat325;707078 said:weldone job bro....mantap....so any news on the gear shift n more pic bro...
No progression so far. Due to differential current drawn between the original gear faceplate and LCI gear knob, I accidently burnt the electronic circuit in LCI gear knob. That's the cost I need to pay because of too brave to attempt that retrofitting :stupid:.
I did tried to put the potentiometer to balance the current for both, but unfortunately those potentiometer is wrongly rating and led to burned of electronic circuitry. As for now, I using the knob as deco only, and disconnected all the wiring underneath the faceplate.
I might change it out with SMG knob which have plug n play retrofit kit as it now on the market, and it'll cost a bomb I guess :joyman:
Similar threads
- Replies
- 1K
- Views
- 109K
