BMW E39 530i M-Sport Individual Aegean Blue Edition 2003

  • Click here to become an Official Member of BMW Club Malaysia Download Form
brilliant stuff Haywire.

Always like the sunshades pack in the car but so far of all my cars, only my E60 and previous W140 came with it

You think there is a possibility in sourcing kit for my Mom's E90 for the rear and side shade?
Cant seems to find anything on UK Ebay except for the manual roller shade
 
These things needs patience, bro. You will need to waits months, checking ebay worldwide until a specific one for your car came up. Its a pretty rare stuffs to be on sale, and requires a labour of love for it to materialise.

Bro Astroboy got one set of side blind for his E90 a few months ago locally from a member.
 
i started that thread but no one wanted to part with it.
Was hoping someone with an SE spec car to dekit it before selling but still no luck yet.
Need the rear blinds too.
 
ck318ci;707334 said:
i started that thread but no one wanted to part with it.
Was hoping someone with an SE spec car to dekit it before selling but still no luck yet.
Need the rear blinds too.

I have some presents for you this coming New Year bro:

6725985609_ccb4ff2512_z.jpg


http://www.ebay.de/itm/3er-BMW-ELEKTRISCHES-ROLLO-ABLEGEBODEN-HUTABLAGE-E90-/360207297839?pt=DE_Autoteile&hash=item53de072d2f

http://www.ebay.de/itm/3er-BMW-ELEK..._Autoteile&hash=item53de07204b#ht_1035wt_1297

http://www.ebay.de/itm/BMW-M3-E90-Hutablage-elektr-Heckrollo-Sonnenschutzrollo-/270771862414?pt=DE_Autoteile&hash=item3f0b42bb8e#ht_2027wt_1396

http://www.ebay.de/itm/BMW-M3-E90-Hutablage-elektr-Heckrollo-Sonnenschutzrollo-/320616097586?pt=DE_Autoteile&hash=item4aa6356732#ht_2524wt_1163

http://www.ebay.de/itm/3-BMW-E90-SONNENSCHUTZROLLO-ELEKTR-HECKROLLO-HUTABLAGE-/360221527405?pt=DE_Autoteile&hash=item53dee04d6d#ht_808wt_1396

http://www.ebay.de/itm/BMW-3er-E90-E91-E92-E93-Schaltzentrum-PDC-Heckrollo-/300644789091?pt=DE_Autoteile&hash=item45ffd36b63#ht_704wt_905

Use Google Translate to see it in English. Read carefully, some are intended for through-loading system (folding rear seats).

Sometimes it pays to learn some terms in German when you're looking for BMW parts. These German listings does not appear in worldwide ebay listings.

Tips: Open ebay.de and search for 'E90 rollo' or 'E90 heckrollo'
 
You're the ebay master! :top: ... One of these days you gotta school me on ordering parts from ebay bro i'm still iffy on the whole thing :4:
 
Haywire You DA MAN!

But none fits my colour. Is beige....

thanks again, will start looking at the GERMAN ebay more regularly

By the way, do they do international posting?
 
ck318ci;707861 said:
Haywire You DA MAN!

But none fits my colour. Is beige....

thanks again, will start looking at the GERMAN ebay more regularly

By the way, do they do international posting?

Bro, I think for the side blind you need to grab that one if you really want it. You will need to remove the side blind assembly from that doorcard and install it to your existing doorcard. A confident mechanic can do this for you. Im doing it myself. Thats the realistic way to go.

The door card have hundreds of of combination and specs, its almost impossible to get one exactly like you wanted. There black, beige, grey, red, green leather doorcards, with black, grey, green top trim, with or without side blinds, and so on. You get the idea.

For the rear blind, you can wait for a beige one. not sure how rare it is for E90
 
Bro ck318ci,

Most of them are willing to ship internationally if you're willing to pay the price. Even if they stated 'No international shipping', just drop them an email to ask, no harm done. Some of the link I gave you offers international shipping.
 
Had a long fruitful day working on the car today in Kuantan.

Finally my rear electric blind is working. The satisfaction of own's hard work is priceless :)

Side blinds to follow next.

Also fixed my recently puddling rear footwell. Its the vapor barrier failing, as expected.

DIY writeup and photos will be uploaded when I go back to KL tomorrow.
 
Rear Electric Blind Retrofit Completed

Bits from the last installation of the actual blind and shelf:

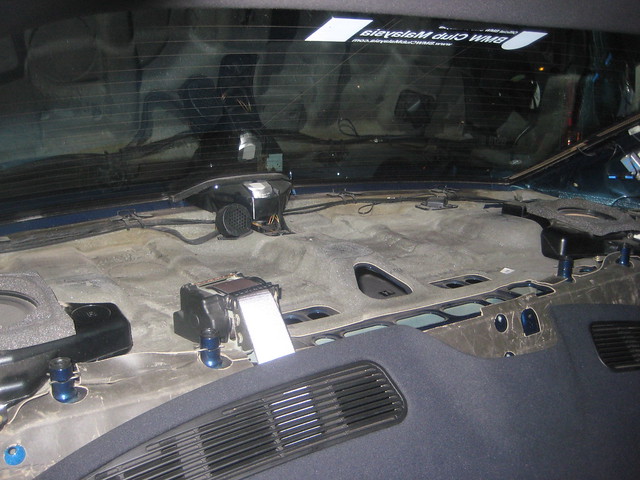
Dismantled the rear seats, seatbelts, C-pillars and old shelf:

6574862351_406fe68429_z.jpg

Old shelf

6574861497_ff3d3dbb65_z.jpg

Removing the seats

6574876569_bde9c80052_z.jpg

Parcel shelf out

6574864099_813e7bdeee_z.jpg

Old shelf and the new shelf with the blind cutout, which was given to me for free by an M5 owner in UK.

6574865911_06131d999c_z.jpg

Plastic bits not included in the new shelf

6574867517_a55057cce0_z.jpg

Plastic bits transferred on to the new shelf

6574869793_d01357c861_z.jpg

The electric blind fitted to the shelf

6574871617_2c7a58136e_z.jpg

Testing the operation of the electric blind. Works fine when connected directly to the battery.

6574875199_0fb54cbae1_z.jpg

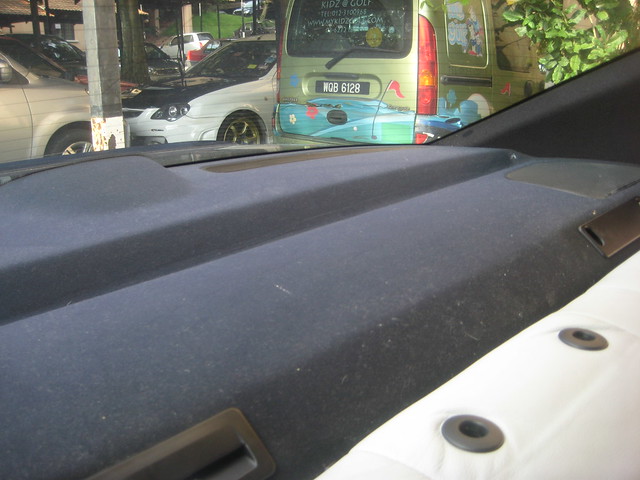
The new shelf with the electric blind goes on the car

6574878151_7336682b89_z.jpg

Note that these plastic tabs are used to hold and align the shelf to the metal part in the car

6574879275_e6ccee0fa8_z.jpg

Those plastic tabs goes into these metal brackets. I had some trouble aligning these earlier, and took me some time to realise their importance. If these weren't aligned properly the C-pillar wont go back in correctly.

6574880339_eef7802dc5_z.jpg

Everything put back together again nicely :cool:

Managed also to run the two wires from the blind to the front centre console.


----------------------------------------------------------------------------------------

Okay that bit is from the last install, this new bit is to complete the wiring for the blind system.

When I first started out this is how my centre console wiring plug looks like:

6174111324_6bfdf618e2_b.jpg


Upon further investigation of BMW WDS (Wiring Diagram System) there are a few wires missing from the plug:

6761457719_3d35227e14_b.jpg


6761457999_58cfc4d46a_b.jpg


6761458095_52c96d295b_z.jpg


And from the plug assignments schedule, I could determine that these pins are needed to complete the install:

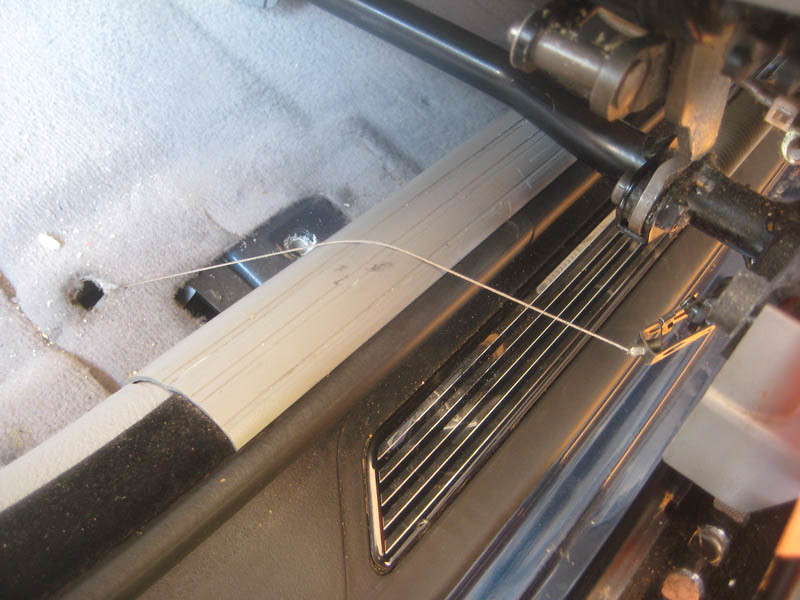
Pin 7: A thick red wire from the centre console, to Fuse 32 in the glove fusebox and then run from F32 to under the driver's seat.

Pin 14 and 15: The two wires directly from the blind.

Pin 21: A wire from the centre console to a junction box behind the glovebox (not the fusebox)

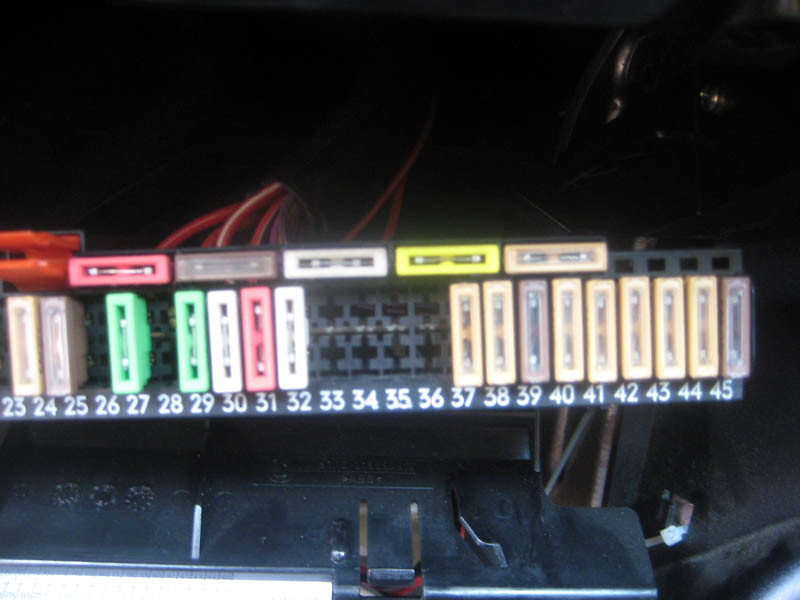
Pin 23: A wire run from the centre console to Fuse 45 in the glovebox.


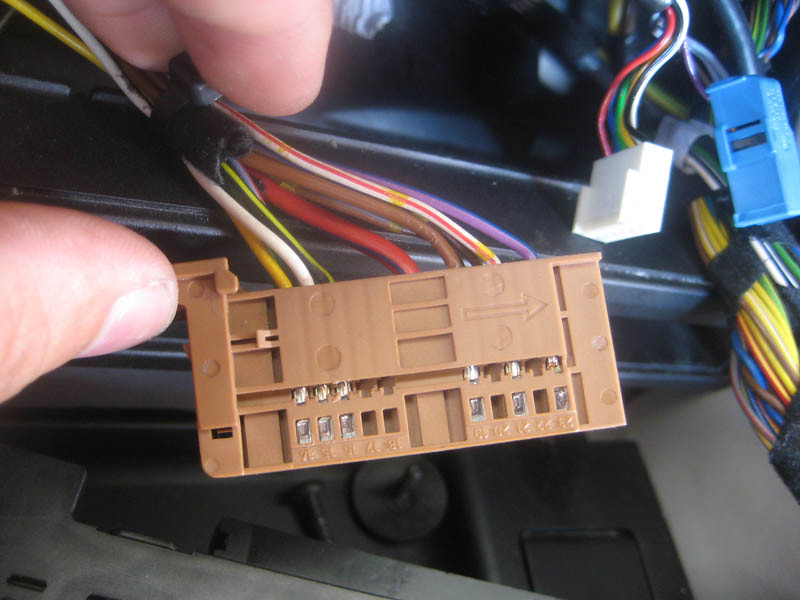
Okay to actually run the wires is a little bit difficult, this is my centre console plug before I started:

6174111324_6bfdf618e2_b.jpg


And this is it when I was finished, a few good wires added to the plug:

6761190379_97d20cb0cf_b.jpg


6761190561_37258be3ee_b.jpg


6761190319_12a9cbf78c_b.jpg


6761190209_ae2665a94f_b.jpg


You can see that I added Fuse 32 and Fuse 45 which was originally an empty slot.

Now thats the easy part. To install the final wire, which is from Fuse 32 to a fusebox under the driver's seat, a lot of works needs to be done.

This is when i started

6761189283_c59bb55424_b.jpg


6761189361_c700aa13fd_b.jpg


Use a T50 Torx key to remove the screw holding the front seat.

6761189425_a526c51d1e_b.jpg


Then the screw in the back. A total of 4 torx screw needs to be removed.

6761189493_7d64bcca9f_b.jpg


Move the seats so it can be taken out easily.

6761189569_8dd2859a05_b.jpg


Two more things to disconnect to remove the seats: The seatbelt tensioner and the occupancy sensor wire.

6761189661_d274d59c3a_b.jpg


Driver seat taken out

6761189737_e55cda7514_b.jpg


The occupancy sensor wire and the seat belt tensioner below the seat position.

6761192077_1986f55b50_b.jpg


Door sills and B-pillar cover removed to lift the carpet. (This is a picture of the other side, forgot to take the driver's side but its the same).

6761189921_07b47ba5dd_b.jpg


Lifted the rear carpet in order to lift the front carpet.

6761190089_4a3ba46921_b.jpg


6761190155_b1a2cc8f6e_b.jpg


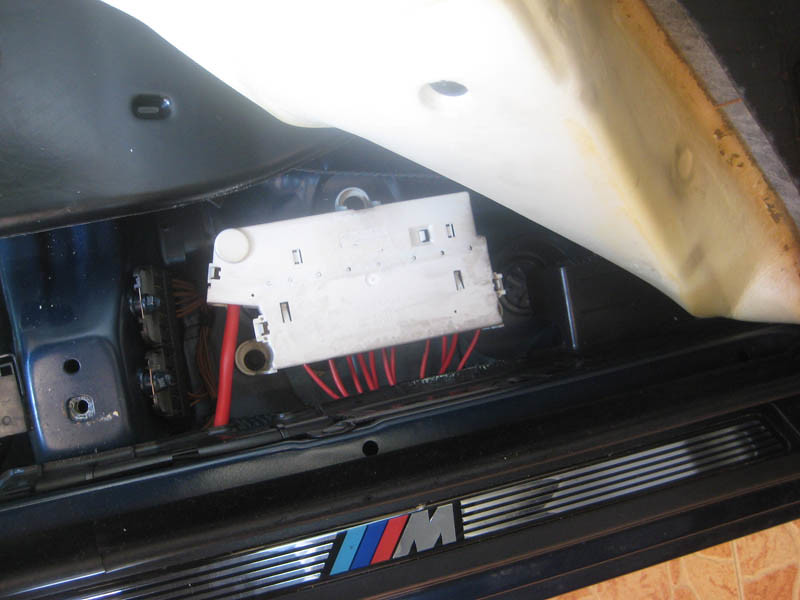
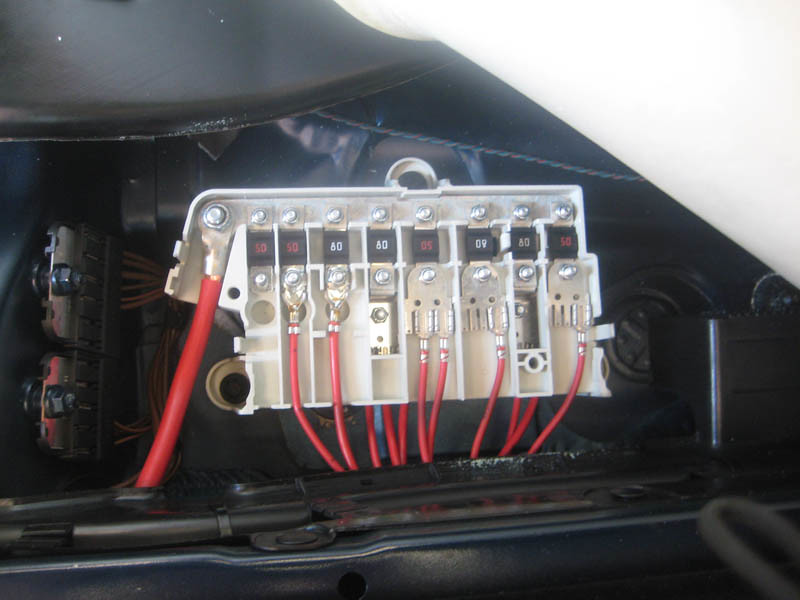
This is the junction box that I needed to access

6761190429_fc198ccf97_b.jpg


6761190493_e8bda51f04_b.jpg


Connected the red wire and I'm done. All proper connectors are used which are taken from chop shops.

6761190561_37258be3ee_b.jpg


Tested the blind button and it worked as anticipated. Phew what a job!

6764039599_7467349980_b.jpg


Look what a mess I made in the car that day! Note that I'm also fixing my vapor barrier which will be updated in the next post.

6761190635_df0e8a3e6a_b.jpg
 
e39 Vapor Barrier Fix

As some of you know, there are a common fault with the vapor barrier in these cars. I noticed recently that after heavy rain or a car wash I would have a small puddle in my rear footwell carpet. I knew straightaway that the vapor barrier had failed, but i had no time to fix it until this Chinese New Year holiday. As I am taking off the front seats for the blind install anyway, I took the opportunity to fix the vapor barrier as well.

Some people fix the vapor barrier, dry the carpet and leave it just like that. To do the fix properly you need to lift the carpet and let the foam underneath dry out. The foam underneath the carpet does a great job for sound insulation, but also acts as a massive sponge when there is a leak. Although from the top of the carpet it feels dry, underneath will still be wet and attracts rust to the body.

So to fix the vapor barriers:

6761190715_49f7401f0f_b.jpg


The vapor barriers sits behind the doorcard.

6761190763_95f267c196_b.jpg


Begin by removing the torx screw behind the door handle

6761190825_549242c738_b.jpg


Then pry out the handle and the window switch. Also remove the light under the door.

6761190873_494e0880ff_b.jpg


Then just pry the doorcard out with a prying tool. Use a paper or cloth so that it does not damage your doorcard or paintwork. Some people just used dinner knife and it worked just fine. Pry at the location of the door clips.

6761190985_7c8df307ce_b.jpg


Its quite easy to remove actually. This is my first time removing the doorcards.

6761191079_b74b56e8e6_b.jpg


There's another holding pin right in the middle of the doorcard behind the handle. Pull the handle/doorcard inwards and these will come out.

6761191199_48656ef7ea_b.jpg


The vapor barrier exposed. It is that black piece of foam on the door. Note that at the bottom of the door there's evidence of water penetration.

6761191819_87ce29d889_b.jpg


Okay if you're having the leak in your car best to get it fixed asap. First thing is your doorcard which is made from wood fiber will deteriorate with the water, and also the puddling will also create rust in your car bottom.

6761191425_95fd8bf04b_b.jpg


This is where the seal fails. BMW uses a strip of Butyl tape to seal the vapor barrier. Over time this sealant loses it adhesiveness and let water come through it. We need to reseal this back.

6761191529_87825ecc6a_b.jpg


There's actually no cost to fix this if you're doing this yourself, just need a heatgun to reheat the Butyl tape and fix it back. It'll be as good as new.

6761191685_1486be7ed1_b.jpg


Some more seal coming off at the top. Basically you need to check all around the vapor barrier to check for leaks. Re-heat the butyl and stick the vapor barrier back.

6761191747_a2308830fd_b.jpg


Same leak on the other side. Repeat the same process.

Now after thats done, put back the doorcard to the door. In order to do the job properly, you will also need to dry out the carpet by lifting it up and let it dry good.

First, remove the front seats. (read the DIY for the blind install above).

Then remove the rear bench.

6761192077_1986f55b50_b.jpg


Then remove the door seals and B-pillar cover. These just pulls up.

6761189829_c68811d11f_b.jpg


Then you can lift the carpet. Look at the wet foam!

6761189999_7e9e59b19a_b.jpg


I lifted both side of the carpet since both sides were leaking. Tied them together with cable ties and let them dry.

6761191925_70ce31463b_b.jpg


Well, a fan to help the drying process wouldn't hurt!

6761192003_7b6c284efb_b.jpg


After the carpets were dried put them back together again and used the opportunity to thoroughly clean the interior of the car. It has gotten dark, I started the process including fitting the wiring for the blind early in the morning. but to be honest, it took a bit of time for the carpet to be totally dry.

6761192201_9e0f1d5c52_b.jpg


Had a nice dinner and put everything back together afterwards. Not a single screw or nuts missing or left out. :rock:
 
KC and Seech are detailing masters. You in the other hand should be crown the king of diy projects!
 
Taking out is easy , putiing it back bit by bit need lots of passion & patient and not everyone can do that , wonderfull work bro .
 
Bro, if I knew earlier you'd done that in Kuantan, for sure I'd join you. Rugi..rugi..
 
zun;708786 said:
Bro, if I knew earlier you'd done that in Kuantan, for sure I'd join you. Rugi..rugi..

What do you need to do?

Doing the rear blind install AGAIN tomorrow in Raub for bro Harbhajan he he he he...
 
haywire;708793 said:
What do you need to do?
Doing the rear blind install AGAIN tomorrow in Raub for bro Harbhajan he he he he...

Want to fix my right door blind (the small glass side). It couldnt shut off. Tomorrow, what your ETA in Raub bro?
 
zun;708799 said:
Want to fix my right door blind (the small glass side). It couldnt shut off. Tomorrow, what your ETA in Raub bro?

Wouldn't shut off? You mean it wouldn't retract? I think the spring mechanism has failed...same as bazet's failing quarter blind.

Its quite easy to dismantle though, no need to remove the doorcards. Just need to pry the top clip off and it will come out. Have not done this before myself but looks easy from the photos below, see how its secured on top and bottom of the quarter blind:

6763976211_16efffb142_b.jpg


6763976247_84c84a4ba9_b.jpg


Remove the top first

6763976153_d768075d25_b.jpg


Bottom will just come off as soon as you take the blind out.


Anyway I think I'll be in Raub at around 10-11am, and probably will be there all day to install the rear blind for Harbhajan.
 
With all the wires and socket I'll sure burn the car if I DIY. Your DIY only cost 60 cents coins on your centre console haha.

The water leak at door card is usual problem for E46 & E39. For added secure you may put round gum normally use by accessories shop. And for the door card you may put clear silicone to hardened it.

Ass up for a good DIY! hehehe
 
Top Bottom