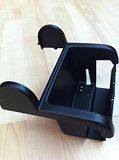
AmoiSky
Official Member
- Joined
- Dec 19, 2012
- Messages
- 619
- Points
- 28
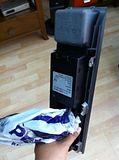
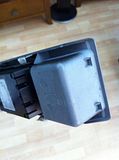
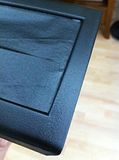
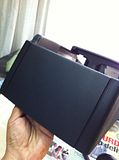
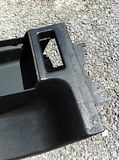
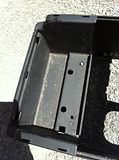
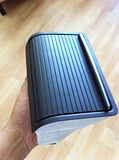
Hi all,I am sharing my plasti dip small project for those who may need some extra reassurance on plasti dip...My Project started at 330pm and finished by 6pm.. Slow due to many phone calls in between.. After all each item do require 15 minutes to dry and i only have one place to do it.. So moving each items form spraying section to drying section takes about 5-10 min waiting time.. Need to make each is dry before i start touching it..Before i start, i make sure i have the tools required.. And off coz, my handphone to access the you tube "how to open e46 center console".. Hihi.. Very easy.. Here's the link. http://m.youtube.com/#/watch?v=HvoMyyte_Gc&desktop_uri=%2Fwatch%3Fv%3DHvoMyyte_GcDengan semangat yang berkobar-kobar, i prepare a space where there is no wind, enuf space, and very bright.. Here are the before pictures for center console, ashtray compartment and its holder..Before...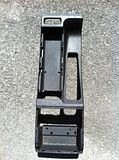 Can see the scratches and the dirt?
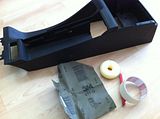
 So, a few things required to do this including a can of plasti dip black (forgot to take picture of the can)
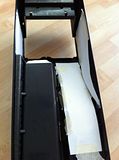
 I start small.. Eagerness can ruin this project so i chose the smallest item. The ashtray compartment..Did my first coat and i think for a first timer, quite a good job at it.. I hold the spray can at about 15-20cm distance from the surface.. Make sure you cover any surface that doesn't require spraying like the metal strip on the ashtray cover and any other areas undesireable for dip to you.. Do choose wisely..By using the kertas pasir, i clean some scratches on the surface of the console.. Some came out, some not.. So choose the kertas pasir yg a bit kasar sikit if possible.. I dont really know the types but mine is quite smooth type.. So not a really good choice..I cover some parts of the console to make sure i didnt accidentally sprayed onto places that i dont want to..This is how i prep my center console
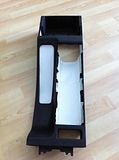 These are all the first layer of plasti dip on each item..
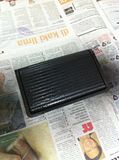
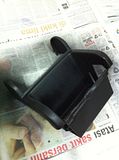
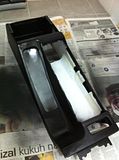 This one comes in gray actually so i did my first layer thicker than the rest.. And i cover the mid section and the wire behind it so it wont be sprayed..Handphone tray.. (apparently its for nokia phones)http://i1279.photobucket.com/albums/y531/noraazil/DIY%20dip%20console/th_image_zpse1aae3a8.jpgThen i did second layer.. Apologize for the picture.. Not so canggih phone..http://i1279.photobucket.com/albums/y531/noraazil/DIY%20dip%20console/th_image_zps1ce9490b.jpghttp://i1279.photobucket.com/albums/y531/noraazil/DIY%20dip%20console/th_image_zps3cb68c9f.jpghttp://i1279.photobucket.com/albums/y531/noraazil/DIY%20dip%20console/th_image_zpsacf8d71c.jpghttp://i1279.photobucket.com/albums/y531/noraazil/DIY%20dip%20console/th_image_zps42f095f1.jpgBy the third layer all items are looking like this..http://i1279.photobucket.com/albums/y531/noraazil/DIY%20dip%20console/th_image_zps5c72ba6f.jpgBut i decided to put a forth layer on the center console alone.. My kertas pasir not so good so some scratches stil visible.. But acceptable..The ashtray part i took out the tape covering the metal lining with caution.. http://i1279.photobucket.com/albums/y531/noraazil/DIY%20dip%20console/th_image_zpsde6d8fc0.jpgAnd TA DAAA!!!http://i1279.photobucket.com/albums/y531/noraazil/DIY%20dip%20console/th_image_zps26517bd9.jpgSo now i am just waiting for all items to dry off before i reinstall it back to my car.. Gotta drive without center console tonight..I will post the pictures later once everything fully dried out.. Cant wait to see the results!P/s: thank you Bro Yassin for the plasti dip.. Well worth it!!
 Can see the scratches and the dirt?

 So, a few things required to do this including a can of plasti dip black (forgot to take picture of the can)
 I start small.. Eagerness can ruin this project so i chose the smallest item. The ashtray compartment..Did my first coat and i think for a first timer, quite a good job at it.. I hold the spray can at about 15-20cm distance from the surface.. Make sure you cover any surface that doesn't require spraying like the metal strip on the ashtray cover and any other areas undesireable for dip to you.. Do choose wisely..By using the kertas pasir, i clean some scratches on the surface of the console.. Some came out, some not.. So choose the kertas pasir yg a bit kasar sikit if possible.. I dont really know the types but mine is quite smooth type.. So not a really good choice..I cover some parts of the console to make sure i didnt accidentally sprayed onto places that i dont want to..This is how i prep my center console
 These are all the first layer of plasti dip on each item..

 This one comes in gray actually so i did my first layer thicker than the rest.. And i cover the mid section and the wire behind it so it wont be sprayed..Handphone tray.. (apparently its for nokia phones)http://i1279.photobucket.com/albums/y531/noraazil/DIY%20dip%20console/th_image_zpse1aae3a8.jpgThen i did second layer.. Apologize for the picture.. Not so canggih phone..http://i1279.photobucket.com/albums/y531/noraazil/DIY%20dip%20console/th_image_zps1ce9490b.jpghttp://i1279.photobucket.com/albums/y531/noraazil/DIY%20dip%20console/th_image_zps3cb68c9f.jpghttp://i1279.photobucket.com/albums/y531/noraazil/DIY%20dip%20console/th_image_zpsacf8d71c.jpghttp://i1279.photobucket.com/albums/y531/noraazil/DIY%20dip%20console/th_image_zps42f095f1.jpgBy the third layer all items are looking like this..http://i1279.photobucket.com/albums/y531/noraazil/DIY%20dip%20console/th_image_zps5c72ba6f.jpgBut i decided to put a forth layer on the center console alone.. My kertas pasir not so good so some scratches stil visible.. But acceptable..The ashtray part i took out the tape covering the metal lining with caution.. http://i1279.photobucket.com/albums/y531/noraazil/DIY%20dip%20console/th_image_zpsde6d8fc0.jpgAnd TA DAAA!!!http://i1279.photobucket.com/albums/y531/noraazil/DIY%20dip%20console/th_image_zps26517bd9.jpgSo now i am just waiting for all items to dry off before i reinstall it back to my car.. Gotta drive without center console tonight..I will post the pictures later once everything fully dried out.. Cant wait to see the results!P/s: thank you Bro Yassin for the plasti dip.. Well worth it!!
