anaksarawak
Official Member
- Joined
- Jan 20, 2007
- Messages
- 4,154
- Points
- 0
DYI: **BavToys ANGEL EYES Install Guide E46**
i would like to thank Kevin for this excellent guide.Tools Required:• Phillips Screw Driver (corner lamps) • Flat Head Screw Driver (optional for headlight cover) • Pliers (handy to have) • Electrical Tape • Sturdy Copper Wire (to use as a wire fish) • 10mm Socket or Wrench (ground nut, coolant reservoirs) • Adjustable Wrench (positive battery terminal) • T25 Torx Bit (ECU box cover) • wire Loom (optional)InstallationInstall Time: (anywhere from 30-90min., if you had to do it a second time it will be much quicker)Before you begin:a) Inspect and test your kit prior to installing. If any thing is not working, best to get it replaced before taking your headlights apart.b) Pop open your hood.c) Get lots of water if you dehydrate fast.
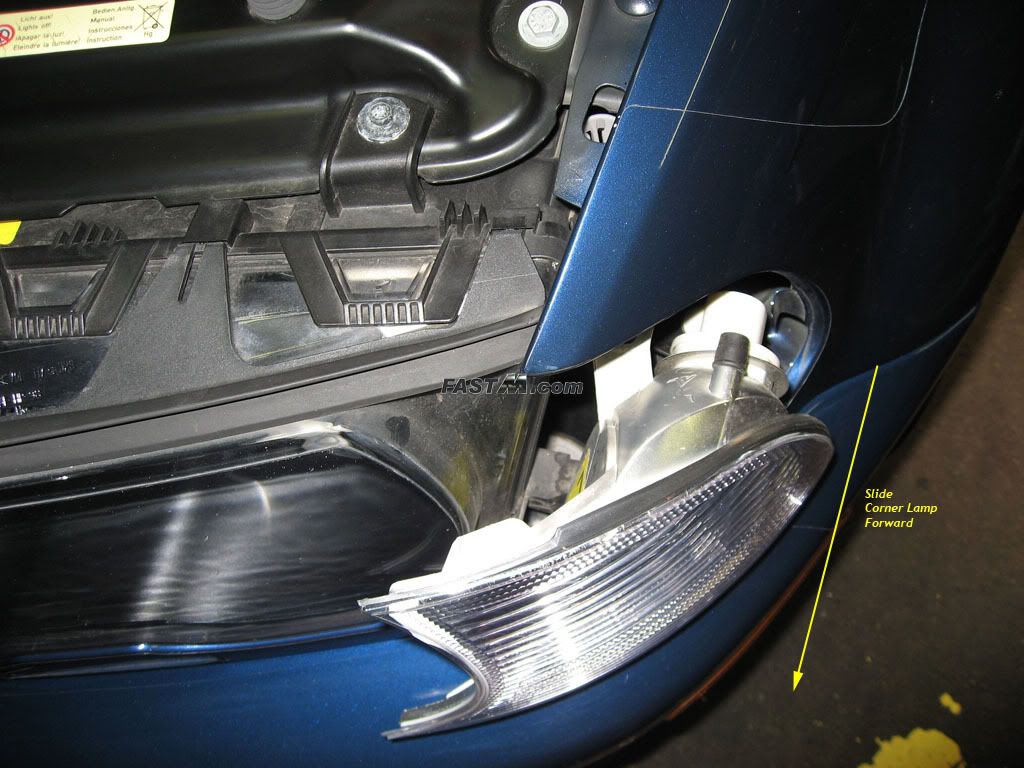
 Step 1. Headlight lense removal(Driver's side shown, Passenger side similar)1a) Remove the turn signal corner lamp. Use a Philips Screw Driver to loosen the retaining screw as pictured below. The screw does not come out so don't keep turning or you'll be turning forever. Once loosen, slide the corner lamp forward and undo the bulb connector. Set the lamp aside

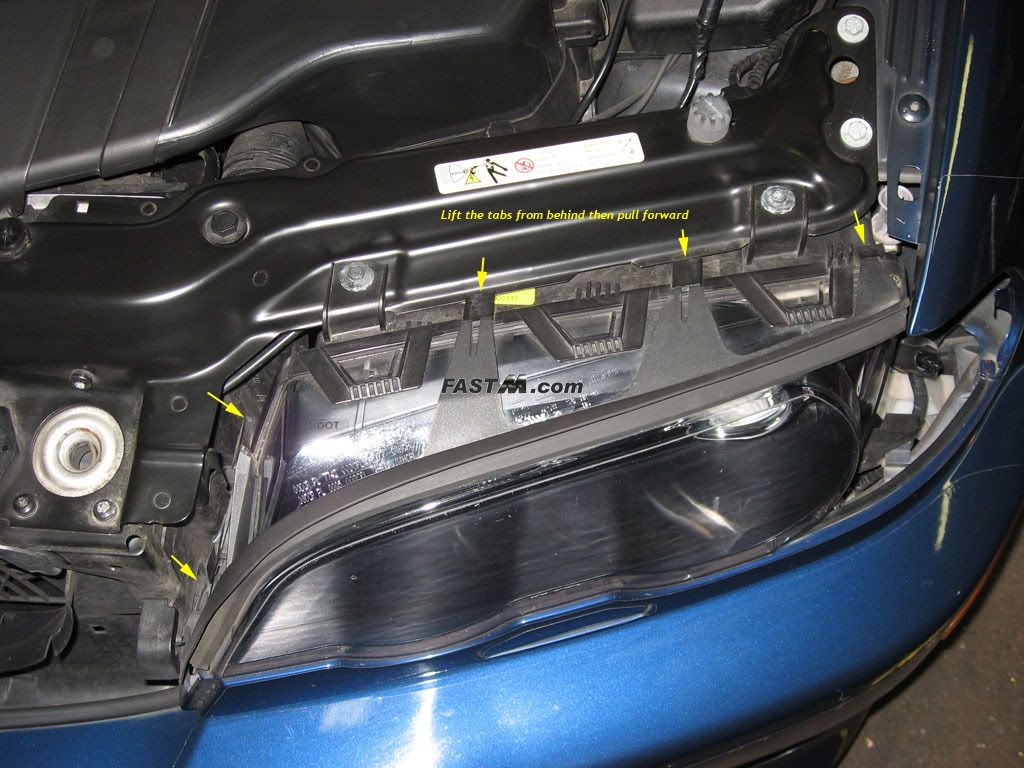
 1b) Remove the rubber trim surrounding the top/side of your headlight. You can easily undo the top 3 tabs with your fingers by lifting the tabs from behind. The two tabs on side might be easier with a flat head screw driver.
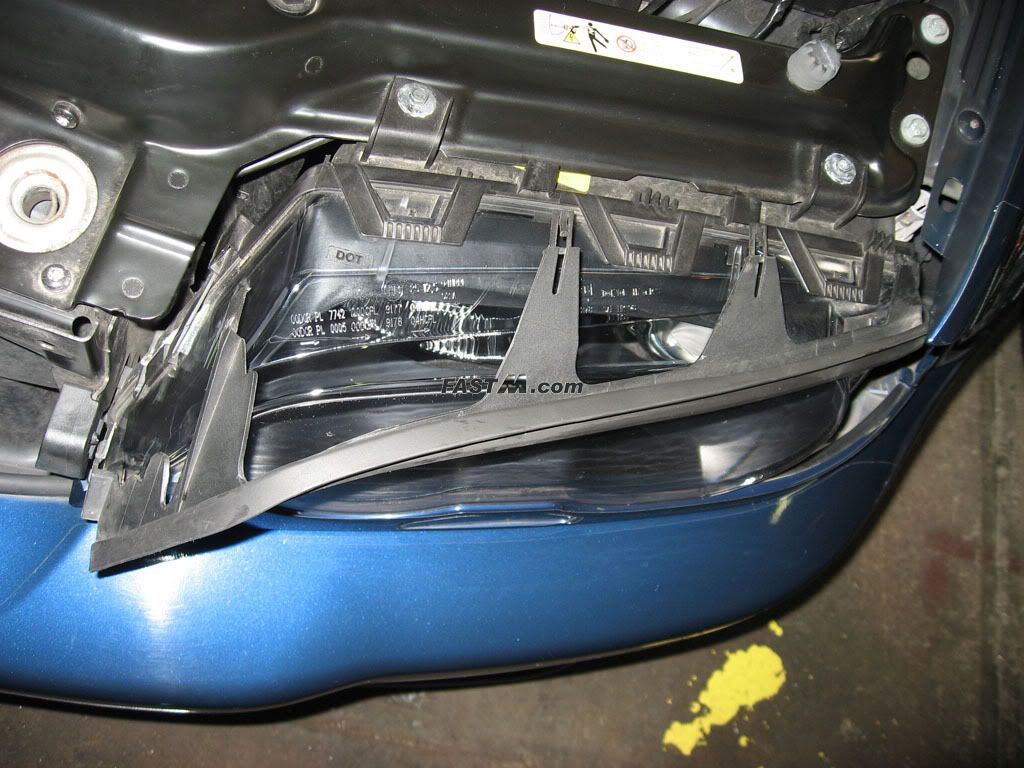 1c) Remove the lower painted headlight trim. If you have the cold weather package with the headlight washer like I do, it will be easier if you did not remove the entire trim. Start by unlatching the trim from the end closest to the grill then the latch that is visible from where the corner lamp was removed. To unlatch you simply reach from behind and unhook it similar to how your removed the rubber trim. If you have the headlight washer, you do not need to disconnect it, just tilt the trim piece out as far as you can. That should give you enough clearance. If you do not have the headlight washer it's up to you if you want to remove it entirely or just tilt it out.
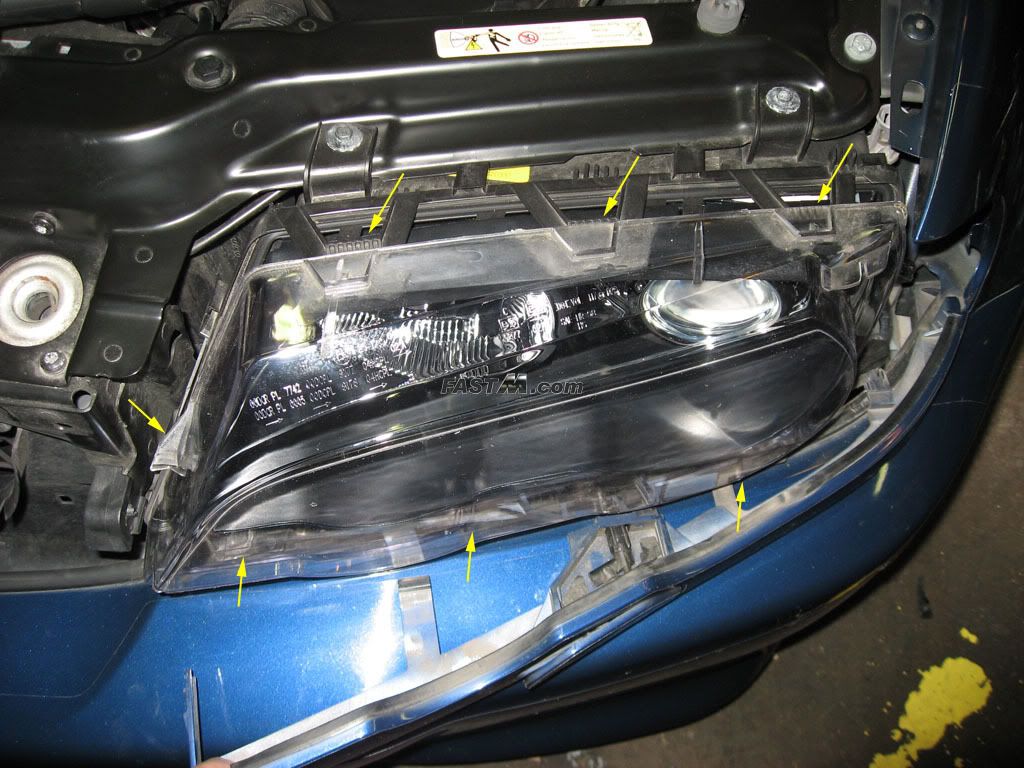
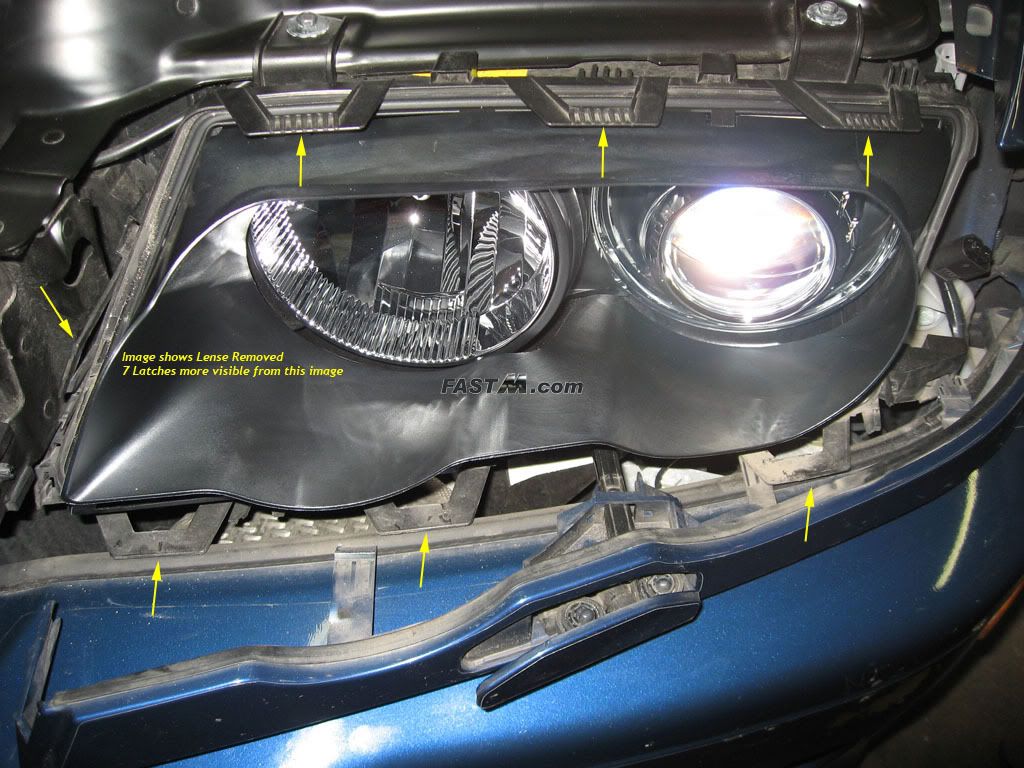
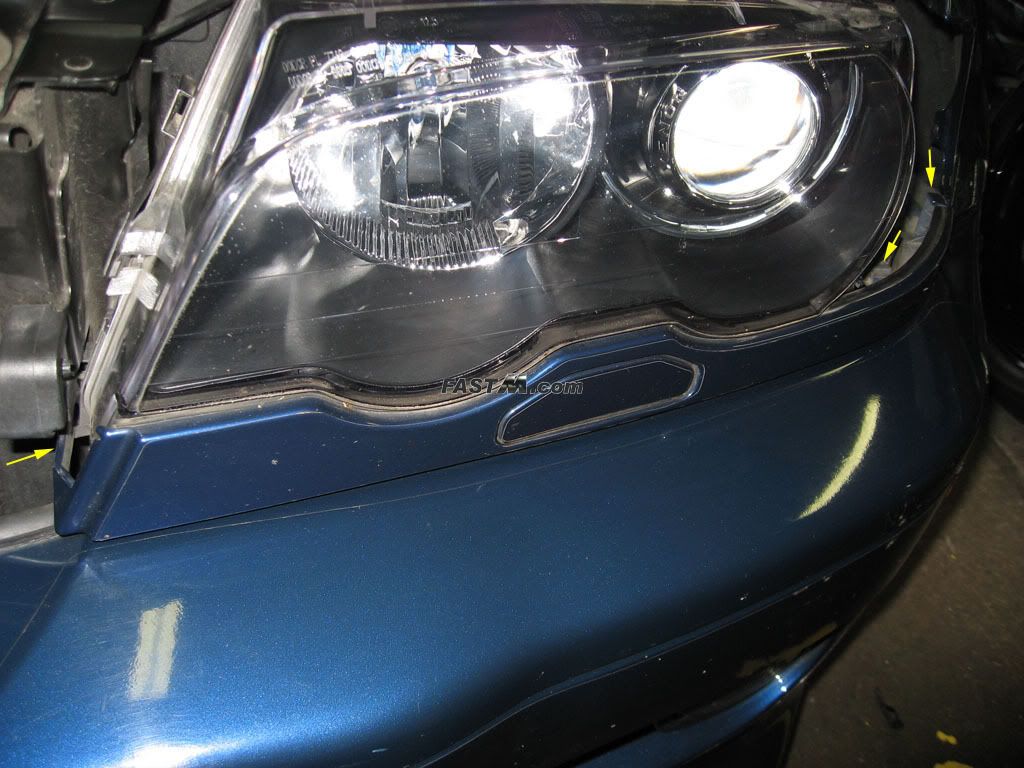 1d) Remove the clear headlight cover lense. Tools aren't really necessary here. There are three plastic tabs on top, one on the side, and three on the bottom that must be unlatched. Carefully pull up on each tab till it releases from lense. As you work your way around each tab you should be able to remove the lense by sliding it out.
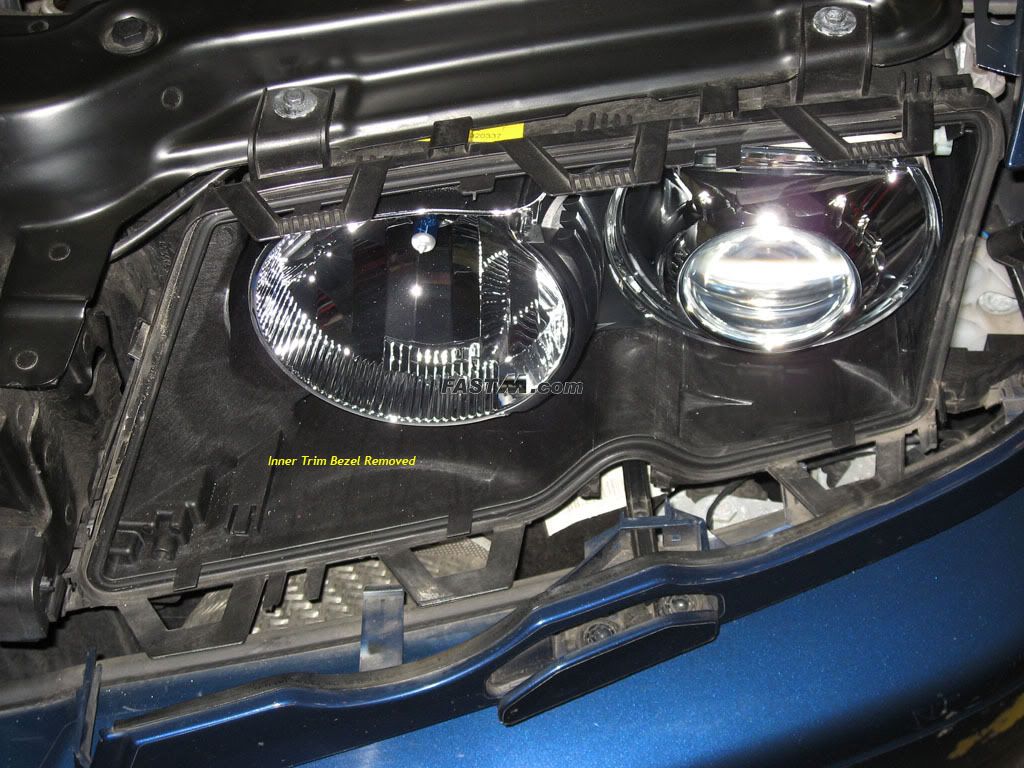
 1e) Remove the OEM inner trim bezel. The bezel simply pulls straight out. No tools needed.
 __________________
i would like to thank Kevin for this excellent guide.Tools Required:• Phillips Screw Driver (corner lamps) • Flat Head Screw Driver (optional for headlight cover) • Pliers (handy to have) • Electrical Tape • Sturdy Copper Wire (to use as a wire fish) • 10mm Socket or Wrench (ground nut, coolant reservoirs) • Adjustable Wrench (positive battery terminal) • T25 Torx Bit (ECU box cover) • wire Loom (optional)InstallationInstall Time: (anywhere from 30-90min., if you had to do it a second time it will be much quicker)Before you begin:a) Inspect and test your kit prior to installing. If any thing is not working, best to get it replaced before taking your headlights apart.b) Pop open your hood.c) Get lots of water if you dehydrate fast.